Lawn Lake, RMNP, June 29, 2013
 It’s been a long time since I last posted. Been busy with a new project. I’m about 2 dozen hikes behind, so I’ll try and do some catchup in the next few months.
Earlier this summer, yes, THIS summer : ) I hiked up to Lawn Lake in Rocky Mountain National Park. It’s about a 6 mile hike, one way, with lots of great views along the way. And, of course, Lawn Lake at the end of the hike. These are pretty small sized photos of the hike. If you want to see much larger versions, and all of the photos, please check out my gallery here.
The hike up to Lawn Lake was very pretty. Aspens were all turning green and there were lots of little streams full of water to cross. Not too many people on the trail. Here is the view of the upper basin. Lawn Lake itself is just a couple of hundred yards further up the trail.

Zoomed in a little. Just enough snow left to make it look “alpine’ish”.

First full view of the lake. There were half a dozen or so people around the lake. But, it is such a large area that I felt like I had it all to myself.

The reason for a lack of flowers in the photos is because this was still early in the season at this altitude. In another couple of weeks, all sorts of wildflowers will be bursting out of the ground. But right now, just some early dandelions. Still, they did add some color.

I had planned on hiking up to the next lake above Lawn Lake. Crystal Lake I think is the name. I was feeling strong (relatively speaking : ) My feet were in good shape. Partially due to my decision to “lighten up.” That is, carry less weight on my back. My son Conor had provided me with a new smaller and lighter pack (a camelback) that was working out perfectly to “force” me to carry less. The other area that was helping were my boots. Or, lack there of. My other son Will had influenced me to acquire a very light pair of trail shoes the summer before. The trail shoes were working great and weighed approximately 537 pounds less than the old leather boots I used to wear : )
Unfortunately for me, the weather had other plans. The trail I wanted to head up to Crystal Lake was towards that distant ridge. Yeah, the one where all those dark clouds are starting to appear. It’s always difficult to predict, but in my experience those clouds meant rain and lightening. I decided to head back down the trail. It had been a great hike so far and I didn’t want to ruin it by getting fried by the thunder god.

Saw this deer alongside the trail on the way back down. I did my best (without leaving the trail) to see if I could locate a fawn nearby. But didn’t see one.

Looking back towards the area of Lawn Lake, I saw that my decision was, as far as I was concerned, a wise one. The storm was fast approaching.

I’d really like to take the trail to Black Canyon. It intersects the Lawn Lake trail about 1/2 mile down from Lawn Lake. You can end up at either the Cow Creek trailhead or the Gem Lake trailhead (what it calls the Lumpy Ridge Trailhead on the sign). But you need to have worked out a shuttle system.

And here is a view looking down the trail. Yes, I did get rained on while hiking back to my car. But that’s why I carry a poncho. If you look at the big rock at the bottom of the photo, you can barely see a lonely red Indian Paintbrush.

Great hike and not too far from Fort Collins. Definitely recommended. Just make sure you check the trail conditions in early June to see if the snow is melted enough to get up the trail. And plan for rain. There are times in the fall of the year when the afternoon thunderstorms are not happening. But the storms are definitely a “feature” during the summer months.
– Geoff Weatherford
East Inlet trail with Conor, RMNP, October 9, 2012

We got a bit of a late start, so I did not stop in Grand Lake for a bite to eat before hitting the trail at around 11 am. Conor chowed down on some pizza right before we started up the trail. NOT just ANY old pizza, but Coopersmith’s pizza. I think I vaguely remember playing some pool and drinking beer the night before. Possibly a reason for the late start : )
Conor visited me in Colorado in the Fall of 2012. We had a rather good time, including a great hike up the East Inlet trail in RMNP (Rocky Mountain Nation Park) to Lone Pine Lake. This link should take you to a nice RMNP map http://www.nps.gov/common/commonspot/customcf/apps/maps/showmap.cfm?alphacode=romo&parkname=Rocky%20Mountain ). Perfect fall weather prevailed for the hike. Which was a bit of luck because Conor experienced just about every type of Colorado weather (outside of a tornado) during his visit.
Before I go any further in the trip’s description, here is my standard, rather longish, comment. Please check my photo galleries here for all the larger and higher quality photos for this trip. The photos in that gallery are a quantum leap in size and quality compared to the little teaser photos I put in this site’s trip narrative (plus there are more of them). See below for a Google Map link to the location of the hike. (If you want to see all my trips, this link will direct you to a MapQuest map that shows ALL my trips. Please note that some of the links for the hikes are located somewhere in the hike itself, while other links on the map are the trail head for the hike located on a road. The issue being, even if the link looks like it’s pointing to a road, that’s actually just the trail head.) All links should open a new browser window.

Here is a live Google map showing the location of the hike. Point “A” from Fort Collins leads to point “E” at the East Inlet trail head.
You can “grab” the map to scroll it around and use the “+” and “-“ icons in the upper left hand corner to zoom in or out to get more detail. You can also click on the “View Larger Map” link and it will bring up the map in a larger window (if you right click on the “View Larger Map” link and select “Open Link in new tab/window” then you can have both my blog and the map open at the same time).
The first mile or more of the trail takes you past some very nice meadows that are sprinkled along the trail. This is the first one. This is also the first place where you can get a good view of exactly where we were headed. See that big mountain looking thing in the far distance? The trail goes right up to it and then hooks a left. The trail is 5.5 miles one way, gains around 1,500 feet, and is listed as “strenuous” by the park service. The “strenuous” label is a bit dependent of how much your pack weighs, your age, if you’re a local or just visiting from a low altitude section of the US, and just how fast you finish the hike.

A bit further up the trail you come up onto a rise that lets you look look across another large meadow.

We met some nice folks that had us take a group photo for them. Once done, they returned the favor for us. As you can see, Conor has taken off his soft shell jacket. I only had a tshirt under my fleece pull over, so I elected to just keep it on. It was very pleasant in the sun, but cool in the shade and/or if the breeze picked up.

As an indication of the temperature (even though it looks sunny and warm), this is a shot of the river right behind us in the photo above. The crinkly surface of the water is due to the fact that there is a thin sheet of ice over the surface of the water.

Photographer taking a photo of someone taking a photo.

I actually have a few photos that Conor took. Such as above. Hopefully he won’t mind sharing them as he got some that I missed. Such as this one of a butterfly (or, moth). His camera takes good photos, and I had some fun showing him how they can be adjusted to look even better with some simple actions in photo editing programs. All we had to do with this photo was sharpen it just a bit.

Here is the waterfall. At this time of year its small. VERY small. In June the water is hitting on top of the bridge.

Again, it’s getting a bit chilly at night. This closeup photo shows ice cycles hanging at the top of the waterfall and ice covering the grass to the right.

We missed most of the fall colors. The leaves have fallen from majority of the aspens.

Eventually you get up high enough to be able to see all the way back to Grand Lake.

Here is a photo by Conor showing my awesome professional stance while taking photos. There are a few places on the hike where you definitely would want to be cautious. Particularly if you have children with you. The drop off in front of me is sheer, but I had to walk off the trail a little ways to get to it. There are places right on the trail where one side is pretty steep.

It’s really a very pretty trail. That’s the reason I don’t mind doing it almost every year.

There are, in my opinion, four “sections” to the trail. Section one is a lower one from the trailhead thru meadows. It ends at the beginning of an “altitude gain.”
Section two is the first altitude gain. This is a photo a very small part of the altitude gain. Even the steep sections were nice. They weren’t really “steep”, but more so than walking around meadows.

Once you get past the altitude gain, which provides the hikers with very good views all the way back to Grand Lake, the trail goes past some deep pools and nice forest trails. This would be what I consider section three. The first photo of this email shows one of the deep pools. Lots of nice rest stops.
Here is a section of the trail as it winds through the forest.

The trail goes past a nice set of water falls of tributary that intersects the trail from the left. There is a bridge here that also makes a great rest stop. No photo this trip, but my hike last year has photos of the bridge. Conor and I also spent some time trying to cut (find) a trail that goes up Paradise valley. We crossed the river and spent 30 minutes to an hour of just meandering around. We never found the trail, but at the least I now know where the trail is NOT : ) Next summer I’ll look at a few other places where it appears old trails take off to go up the side valley. It may take me a few summers, but eventually I’ll locate one (well, possible not; I may just end up going up the valley without a trail). I guess I could make it easy on myself and ask a ranger. Kind of spoils the adventure doing that.
After this relatively flat section three, in fact soon after you go over the bridge, you start up section four. It’s moderately long and gains a LOT of altitude. At the end of section four the trail flattens out just prior to reaching Lone Pine Lake.
Conor found a nice little streamlet with some hanging ice cycles. His photo.

A little further down from where Conor was capturing the light, I found a slightly different set of ice.

We made it to Lone Pine lake. I had to hold on to Conor or fall down.

Lone Pine lake is not very big, but it does have it’s charm.

Of course, Conor wanted to go out to the island to eat our “lunch”. Privately, I figured attempting to get to the island may eat my lunch. But I said, “sure, heh, why not 🙂
Conor easily traversed a log in getting across the first “step” to the island. However, I was a little more hesitant. But, the proof that I made it was captured forever by Conor.

The rest of the effort to reach the island was pretty much not too bad. Here is Conor trailblazing the way.

We sat in the sun, as it was getting a bit chilly, and ate what food we had. As I remember, it was truffles and champagne (but I could be mistaken : ), but it could have been anything and tasted great. Nice place.
We headed back down noticing that the sun was beginning to make some long shadows.
On the way down, I grabbed a photo of the Paradise Valley area that I want to hike back into.

The setting sun made for some nice photos.

Conor hoofing it down the mountain.

And taking time to examine some rock formations.

The rock has definitely been “stressed”. Bent, so to speak, over time. And now exposed.

The professional at work (by Conor).

It was full dark by the time we got back to the car. The photo above is after getting back to the meadows. Probably had close to an hour of hiking left at this point. Started having to move a little slower. I could make out what was, or wasn’t, on the trail, but the depth perception was pretty poor.

Didn’t get much of a sunset photo because there weren’t that many clouds.

Back at the car. Conor probably wondering …”Damn, does he ever stop taking photos?” Answer = No : )

Great hike. Perfect fall weather. I was surprised that we didn’t hear any elk bugling. Must have been too late in the season. Didn’t hear any and didn’t see any elk. Well, other than the ones I almost ran into driving through the town of Grand Lake. Figures.
On the way back over the continental divide, on Trail Ridge road, Conor had me stop and pull over. He wanted to check out the Milky Way. The stars were brilliant. That said, he had to hang on to the side of the car to make sure the wind didn’t pick him up and carry him to Fort Collins. The wind was brutal and cold.
I’m pretty sure we hit the Crown Pub in Fort Collins on our return. It’s one of the few places that are open late at night (or, possibly in our case, very early morning) that serve great food. Food had been a little minimal on the hike, so it was high on our list of “things to do.”
– Geoff Weatherford
Longs Peak, CO September 15, 2012

Yeah. Longs Peak. Quite the day. Quite the great day, to be exact. Due to some rather poor planning on my part, I did not get to the top of the peak. But I already have next summer’s climb all planned (hopefully much better planning this time). That said, a truly awesome hike was had even without making it to the top.
Before I go any further in the trip’s description, here is my standard, rather longish, comment. Please check my photo galleries here for all the larger and higher quality photos for this trip. The photos in that gallery are a quantum leap in size and quality compared to the little teaser photos I put in this site’s trip narrative (plus there are more of them). See below for a Google Map link to the location of the hike. (If you want to see all my trips, this link will direct you to a MapQuest map that shows ALL my trips. Please note that some of the links for the hikes are located somewhere in the hike itself, while other links on the map are the trailhead for the hike located on a road. The issue being, even if the link looks like it’s pointing to a road, that’s actually just the trailhead.)All links should open a new browser window.

I’ve wanted to climb Longs for a while. I’ve climbed it before (several decades ago), but wanted to do it again. Figured I could make it happen this summer. As it turned out, the scheduling part (mostly by accident) turned out pretty well. We had a bit of snow hit the peak in the middle of the week, but the weekend was perfect weather and it had been warm enough to melt most of the new snow.

In addition to the MapQuest map link above, please see a live Google map below. Point “A” from Fort Collins leads to point “B” at the Longs Peak trailhead. I parked the car just below the parking lot that is specific to the Longs Peak trail. Had to walk five minutes up the road to get to the actual trailhead.
You can “grab” the map to scroll it around and use the “+” and “-“ icons in the upper left hand corner to zoom in or out to get more detail. You can also click on the “View Larger Map” link and it will bring up the map in a larger window (if you right click on the “View Larger Map” link and select “Open Link in new tab/window” then you can have both my blog and the map open at the same time).
Now then, if you read the RMNP web site on climbing Longs, it states that you should be ON THE TRAIL no later than 2 am. Yeah, that means I’d have to leave Fort Collins around 12:30 am. Why so early? To get up on Longs and back down off the peak before the summer thunderstorms hit at noon. Makes sense.
Except. It wasn’t summer any more. I could get on the trail by 7 am and have almost 12 hours of clear sunny sky to do the climb. And, get some sleep so I’d be all rested for the hike. Sounded like a good deal to me. So, I arrived at the trailhead at around 7am.

Sigh. First major WRONG move on my part.
No big deal about the parking (only took me 5 minutes to walk up to the trail head), but it did look as if a LOT of people had gotten up very early. Why was what I did a major mistake? Oh, you’ll find out if you keep reading.
The trail turned out to be very pretty.

And steep. There were LOTS of big steps. No, not like these. I’m talking stairway to Gem Lake types of steps. Thousands over the length of the trail of 12 inch steps one right after the other. It’s possible that is a “slight” exaggeration. But really, plan on a lot of steps.
But, hey, no problem. Just a little stair workout.

First view of the mountain.

Josie at Michigan Lakes, Aug 4, 2012

My daughter Josie told me a while back that she wanted to hike up to Michigan Lakes some time during her visit this summer. She liked the photos from my first hike (see here for a description of my first hike to this area).
Before I go any further in the trip’s description, here is my standard, rather longish, comment. Please check my photo galleries here for all the larger and higher quality photos for this trip. The photos in that gallery are a quantum leap in size and quality compared to the little teaser photos I put in this site’s trip narrative (plus there are more of them). See below for a Google Map link to the location of the hike. (If you want to see all my trips, this link will direct you to a MapQuest map that shows ALL my trips. Please note that some of the links for the hikes are located somewhere in the hike itself, while other links on the map are the trailhead for the hike located on a road. The issue being, even if the link looks like it’s pointing to a road, that’s actually just the trailhead.) All links should open a new browser window.
I said, “Sure, Josie. We can eat breakfast in Fort Collins, run up to Cameron Pass and do the hike, then go into Walden to see Kate, and get back to Fort Collins in time to go eat at Coops.”

In addition to the MapQuest map link above, please see a live Google map below. Point “A” from Fort Collins leads to point “B” at the trailhead. I parked the car at the Forest Service picnic area that is right at the top of Cameron Pass. We walked across the highway to the trailhead. The trailhead starts just up from where the Michigan Ditch road hits the highway.
You will need to purchase a Colorado State Forest pass at the trailhead (self-serve). Cost $3/day/person. So, $6. Very worth while. If you hike a lot in the state forest, an annual pass would probably be a good purchase to look into.
You can “grab” the map to scroll it around and use the “+” and “-“ icons in the upper left hand corner to zoom in or out to get more detail. You can also click on the “View Larger Map” link and it will bring up the map in a larger window (if you right click on the “View Larger Map” link and select “Open Link in new tab/window” then you can have both my blog and the map open at the same time).
“How long is the hike, dad?”

“Oh, don’t really remember, Josie. I think only 4 or 5 miles round trip.”

“Okay, that sounds good,” said Josie.

Encampment River, August 28, 2011

The summer of 2011 was a bit of a dry spell for hiking. I definitely did do some hikes, some very nice hikes, but between June 26 and August 28 of 2011 I did zero hikes. That’s pretty much all the summer. So, when August 28 came up I was ready to do a serious hike. As plans go, it sorta failed, but then again, it sorta succeeded.
Before I go any further in the trip’s description, here is my standard, rather longish, comment. Please check my photo galleries here for all the larger and higher quality photos for this trip. The photos in that gallery are a quantum leap in size and quality compared to the little teaser photos I put in this site’s trip narrative (plus there are more of them). In addition, I have two other links that will help locate the area if you are interested in making the hike yourself. A MapQuest (similar to Google map) map can be found here. You will need to use the plus and minus icons at the top left side of the map (or the wheel on your mouse) to help zoom out to help locate the area based on where you live. (If you want to see all my trips, this link will direct you to a MapQuest map that shows ALL my trips. Please note that some of the links for the hikes are located somewhere in the hike itself, while other links on the map are the trailhead for the hike located on a road. The issue being, even if the link looks like it’s pointing to a road, that’s actually just the trailhead.) In order to help you with the actual trail itself, you can(I need to fix this link, sorry) use this link to view a portion of a topo map that shows the trail I took .Please note that all links open a new browser window.

In addition to the MapQuest map link above, please see a live Google map below. Point “A” from Fort Collins leads to point “B” at the trailhead. The blue line is not quite the route I took from my home in Fort Collins, CO. Sometimes Google takes a slightly different route : ) From Laramie I actually took Highway 230 towards Walden, CO, and then cut north before getting to Cowdrey, CO due to the cows. The route in the map below has takes you on Highway 130 out of Laramie, over the Snowy Range to the town of Encampment and along the route I came out of Hog Park. Either way is fine. The Snowy Range route is very pretty and you may decide to stop and hike there instead : )
You can “grab” the map to scroll it around and use the “+” and “-“ icons in the upper left hand corner to zoom in or out to get more detail. You can also click on the “View Larger Map” link and it will bring up the map in a larger window (if you right click on the “View Larger Map” link and select “Open Link in new tab/window” then you can have both my blog and the map open at the same time).
One good thing is, I got off to an early start. And it was a glorious morning and clear sailing. All the way to King’s Canyon, that is. Kings Canyon is exactly where you enter North Park. Roughly around 20 miles to Walden at that point and all sorts of roads leading to great hiking areas.
Which meant that when I encountered this…….

………I was initially just a little, uh, saddened. Hmmmmm. A rural northern Colorado traffic jam. Well, just how long could it last? Oh, about an hour : ) Yep, took an hour to go five miles to the first place I could turn off that would take me “around” the cows. So, for an hour I just watched the cowboys, and one cowgirl, put on a show for us city slickers.
Oooops, a cow got through a fence on the side of the road and headed back up into the mountains. A cowboy was on it right away.

Luckily, these people actually knew what they were doing. I mean, they knew all about pushing the cows, making temporary openings in fences, and retrieving said cows……….

7 Lakes Trail, Zirkel Wilderness, CO June 26, 2011

For my hiking in 2011, I stayed close to home at lower elevations for as long as I could. We had a LOT of snow in the spring, so the mountains were slow to open. But, eventually, I had to head for some real trails.
Hmmmm. Where to go. I had to be careful in my choice. So, no place that I would have to cross any streams without bridges. The water would be too high. And cold. Okay, I’d head to the 7 Lakes trail out of the Big Creek lakes area NW of Walden, CO. I knew that a good chunk of the trail would be hike-able. And no rivers to cross. Yes, I’d been there before, but every time I went it seemed to be new.
(A photo just to break up my wall of text extended intro to the hike : )

Before I go any further in the trip’s description, here is my standard, rather longish, comment. Please check my photo galleries here for all the larger and higher quality photos for this trip. The photos in that gallery are a quantum leap in size and quality compared to the little teaser photos I put in this site’s trip narrative (plus there are more of them). In addition, I have two other links that will help locate the area if you are interested in making the hike yourself. A MapQuest (similar to Google map) map can be found here. You will need to use the plus and minus icons at the top left side of the map (or the wheel on your mouse) to help zoom out to help locate the area based on where you live. (If you want to see all my trips, this linkwill direct you to a MapQuest map that shows ALL my trips. Please note that some of the links for the hikes are located somewhere in the hike itself, while other links on the map are the trailhead for the hike located on a road. The issue being, even if the link looks like it’s pointing to a road, that’s actually just the trailhead.) In order to help you with the actual trail itself, you can use this link to view a portion of a topo map that shows the trail I took . Please note that all links open a new browser window.
(Another photo just to break up my wall of text extended intro to the hike : )

In addition to the MapQuest map link above, please see a live Google map below. Point “G” from Fort Collins is at the trailhead. Sorry about all the little destination bubbles between Fort Collins and Big Creek lake. Also, the blue line may, or may not, have been the route I took from my home in Fort Collins, CO. Sometimes Google takes a slightly different route : ) However, in this case it looks pretty close. You can “grab” the map to scroll it around and use the “+” and “-“ icons in the upper left hand corner to zoom in or out to get more detail. You can also click on the “View Larger Map” link and it will bring up the map in a larger window (if you right click on the “View Larger Map” link and select “Open Link in new tab/window” then you can have both my blog and the map open at the same time).
The day started out extremely clear and calm. And it also appeared, once I got close enough to tell, that the snow line in the Zirkels was still quite low. Yes, quite low.

Let’s review. It was June 26. In one week it would be pushing July 4 which historically is known in Colorado for being the first part of the summer that you can hike into the high country. As in above treeline. Heh, right. Not this year. Maybe by July 15. Maybe.

I drove past Pearl and turned off to head up to Big Creek Lake. I immediately had to pull over because of the flowers and the view. After a long winter, very pretty.

Red Mountain Open Space, CO June 5, 2011

The first weekend of June, 2011 arrived. I wanted to hike someplace, but the high country wasn’t open yet (not even close). I’d spent the prior weekend hiking Lumpy Ridge, RMNP, so didn’t want to go back in that direction. Hmmmmm. But wait, there were some city and county maintained “open spaces” around Fort Collins that I’d heard were pretty nice. So I took a look at the map and ended up deciding to go to the Red Mountain Open Space. About 45 minutes north of Fort Collins. Really not that far away, but you end up driving around 20 miles on some gravel/dirt roads, so you have to slow down a bit.
Before I go any further in the trip’s description, here is my standard, rather longish, comment. Please check my photo galleries here for all the larger and higher quality photos for this trip. The photos in that gallery are a quantum leap in size and quality compared to the little teaser photos I put in this site’s trip narrative (plus there are more of them). In addition, I have two other links that will help locate the area if you are interested in making the hike yourself. A Google Earth map can be found here. You will need to use the scale bar on the left side of the Google map to help zoom out to help locate the area based on where you live. (If you want to see all my trips, this link will direct you to a Google map that shows ALL my trips. Please note that some of the links for the hikes are located somewhere in the hike itself, while other links on the map are the trailhead for the hike located on a road. The issue being, even if the link looks like it’s pointing to a road, that’s actually just the trailhead.) In order to help you with the actual trail itself, you can use this link to view the Red Mountain Open Space web page. It has a link to a map . Please note that all links open a new browser window.

The day dawned clear and mild. Perfect. I did two things a little different on my way to the open space. One, I drove Will’s car, one of my sons, in order to put a few miles on it. He is doing a hitch in the military and it’s not good to just leave a vehicle sit too long without driving. Two, I loaded up my pack with enough weight to equal what I’d probably carry backpacking for an overnight hike. Around 40 pounds. Heh, didn’t feel that much at first, but by the end of the day, my shoulders and feet could feel the difference. Of course, I made my standard stop to pick up an Americano to drink and an orange cranberry scone to nibble on : )

In addition to the Google map link above, please see a live Google map below. Point B from Fort Collins is at the trailhead. Note that when I posted this, the Google map was outdated and does not show the parking lot. Also, the blue line may, or may not, have been the route I took from my home in Fort Collins, CO. Sometimes Google takes a slightly different route : ) However, in this case it looks pretty close. You can “grab” the map to scroll it around and use the “+” and “-“ icons in the upper left hand corner to zoom in or out to get more detail. You can also click on the “View Larger Map” link and it will bring up the map in a larger window (if you right click on the “View Larger Map” link and select “Open Link in new tab/window” then you can have both my blog and the map open at the same time).
Got to the parking lot pretty early. I saw a few, very few, people around the parking area. I saw no one on the trail itself. Amazing.

The trail is quite well maintained. Foot traffic, horses, and non-motorized bikes are allowed. This would be an awesome place for trail running. One thing to note. NO dogs are allowed at all in the area. Doesn’t matter if they are on a leash or not. This is an important wildlife area. In fact, no one is allowed on the trails from December 1 thru March 1. More information can be found here http://www.larimer.org/naturalresources/red_mountain.htm

This was late spring and the grass was green, flowers were popping up, and the trees had that early bright green gloss that disappears later in the summer. And the bees were out enjoying the day.

Heart Lake Trail, Snowy Range, WY Sept 11, 2010

Finally got to the last real hike I took in 2010 (yes, I know it’s 2012; I still have 6 or so hikes remaining to blog about for 2011 before I start hiking in 2012 : ). And it was a nice one. On an early fall weekend I decided to head to the Snowy Range in Wyoming. It’s one of those areas I like to go to once a year, so I figured it I was gonna make it this year, now was the time. The Snowy Range is a very high altitude land of “timber line and above”. So, winter would come early.
Before I go any further in the trip’s description, here is my standard, rather longish, comment. Please check my photo galleries here for all the larger and higher quality photos for this trip. The photos in that gallery are a quantum leap in size and quality compared to the little teaser photos I put in this site’s trip narrative (plus there are more of them). A Google Earth map can be found here in case you want to go yourself. You will need to use the scale bar on the left side of the Google map to help zoom out to help locate the area based on where you live. (If you want to see all my trips, this link will direct you to a Google map that shows ALL my trips. Please note that some of the links for the hikes are located somewhere in the hike itself, while other links on the map are the trailhead for the hike located on a road. The issue being, even if the link looks like it’s pointing to a road, that’s actually just the trailhead.) Please note that all links open a new browser window.

The day dawned very clear. Your standard perfect fall day in the Rockies. Normally I head for the eastern side of the Snowy Range, but I decided to cruise around to the “back side” on the western part of the range and check it out. Glad I did as the western side has a totally different “flavor” to it compared to the eastern side. The eastern side of the Snowy range has all the popular campgrounds and trailheads. For a good reason, as there are a lot of pretty lakes and scenic views of the mountains. Of course, that means that the eastern side is quite popular. I found the western side to be a different type of “scenic”, much less “approachable” (not near as developed) and, thus, much fewer people.
In addition to the Google map link above, please see a live Google map below. Point B from Fort Collins is at the trailhead. The blue line may, or may not, have been the route I took from my home in Fort Collins, CO. You can “grab” the map to scroll it around and use the “+” and “-“ icons in the upper left hand corner to zoom in or out to get more detail. You can also click on the “View Larger Map” link and it will bring up the map in a larger window (if you right click on the link and select “Open Link in new tab/window” then you can have both my blog and the map open at the same time).
One issue I had at the very beginning was determining just where to turn off the highway to get back to my targeted location for the day’s hiking. My advice is to get a good topo map from Jax or some other place. There are a lot of similar looking dirt road turnoffs. By use of the map I was able to figure out the correct turn off to head towards a trail that led to Heart Lake.

After going only a mile or less on the graveled road I reached a point that looked like a good place to park. A little further the road began to enter that phase where only vehicles with very good clearance and/or four wheel drive should venture. It’s always sorta a guesstimate of where exactly you should pull over and park. With slow driving, and luck, you can get quite a ways on some of the roads. Depends how much you want to risk beating your vehicle up. And, if you don’t get out before dark, such roads get very tricky at the end of the day. I normally err on the side of caution with my little Hyundai.
Because I parked some ways from the trailhead, that meant a little walking on a dirt road for a while. Sometimes this can mean eating a little dust from four wheel drive vehicles. But no worries today. Except for two ATVs (and a couple of parked vehicles) I saw zero people the ENTIRE day. If I had been on the other side of the range I would have had a difficult time finding a parking space and the trails would have been crowded with people. Quite the difference.
The walk on the rough dirt road took me past South Twin Lake.

Baker Gulch, RMNP, Sept 18, 2011

Last fall, Sept 18, 2011, I decided to go up into a range of mountains that, up to now, I hadn’t done much hiking in. I’m referring to the Never Summer range on the west side of RMNP (Rocky Mountain National Park). I was hoping to see a little bit of fall color, but miss the snow. Well, as it turned out, we had some snow a few days earlier, but it all melted off at the lower elevations. One reason I picked the Baker Gulch trail is because it goes up to Baker Pass that I had hiked up to last summer (see this link for a description of that hike, or look at my blog entry directly below this one). Only, I came up from the other side of the continental divide. The idea being that it’d be neat to reach the same place from the opposite direction. Didn’t quite make it, but it was a great hike (and still a great idea : ).
(Just to break up my wall of text extended intro to the hike : )

Before I go any further in the trip’s description, here is my standard, rather longish, comment. Please check my photo galleries here for all the larger and higher quality photos for this trip. The photos in that gallery are a quantum leap in size and quality compared to the little teaser photos I put in this site’s trip narrative (plus there are more of them). In addition, I have two other links that will help locate the area if you are interested in making the hike yourself. A Google Earth map can be found here. You will need to use the scale bar on the left side of the Google map to help zoom out to help locate the area based on where you live. (If you want to see all my trips, this link will direct you to a Google map that shows ALL my trips. Please note that some of the links for the hikes are located somewhere in the hike itself, while other links on the map are the trailhead for the hike located on a road. The issue being, even if the link looks like it’s pointing to a road, that’s actually just the trailhead.) In order to help you with the actual trail itself, you can use this link to view a portion of a topo map that shows the trail I took . Please note that all links open a new browser window.
(Again, just to break up my wall of text extended intro to the hike : )

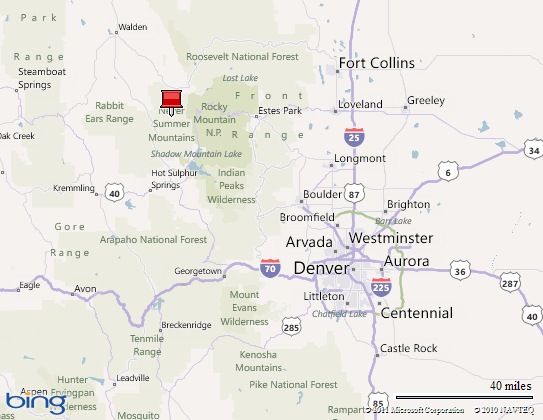
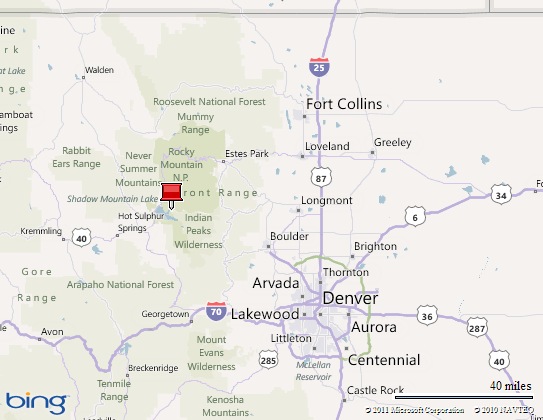
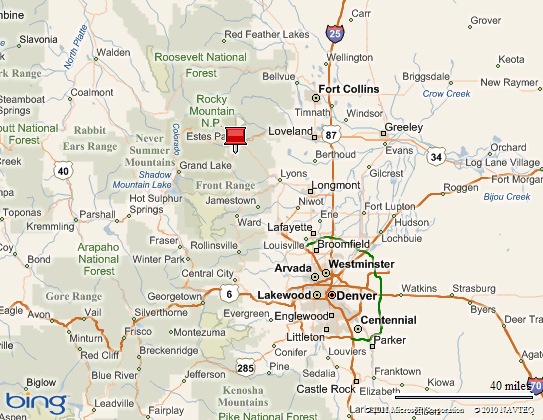
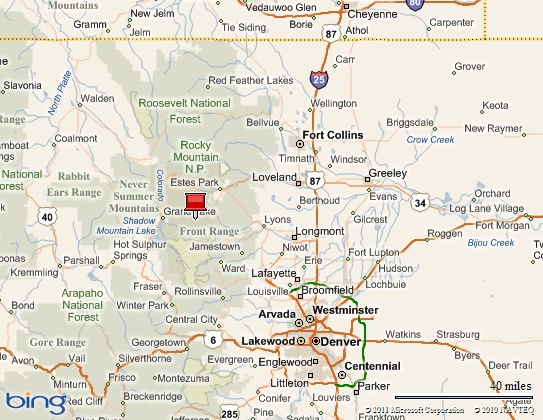
In addition to the Google map link above, please see a Microsoft Live map below. The red tack shows the general location of the trail from my home in Fort Collins, CO. You can click on the map to bring it up in a “live” mode and zoom in or out (and move the map around) to get more detail. Just make sure you don’t close the Microsoft “My Places” editor that pops up with map. If you close the editor (it is small and you can use/scroll/zoom the map without the editor getting too much in the way) without first saving the new location, the location button will disappear. If that happens, just close the map and click on it again on my web page.
Finally, on to the hike itself.
The trail starts off in a small parking lot that you reach soon after coming down off west end of Trailridge road in RMNP. Took me a couple of hours to get there from Fort Collins. But no problem. I’d stopped and gotten my normal “lets go hiking” breakfast of an americano and cranberry scone, so I was raring to hit the trail. It was just a little cool and not much activity. But, from what I could see in the distance, the hike going up the far valley was looking to be quite nice.

The trail, or rather, the road (more on that) crosses the Colorado River as it heads to the west and the Never Summers. The fishermen in the distance are encountering just a small bit of turgidity to the normally, at this time of year, crystal clear water. This is due to a little runoff from a recent snow storm that hit the high country a day before. Of course, the water is still crystal clear compared to how this river looks further downstream. Say, around Moab, UT : )

Baker Pass, Never Summer Wilderness,CO July 31, 2010

There’s a place, an area, a gem of a trail I found last summer (summer of 2010; sorry I’m a little slow : ). I kinda hate to write about it, because I just want to keep it for myself. But, that’s selfish (which doesn’t bother me too much : ). And, it’s an unnecessary worry because from what I can see the number of people going hiking continues to decline. So, if you’re interested in a cool kind of out of the way, but not too far of a drive, hike, then check this out.
Before I go any further in the trip’s description, here is my standard comment. Please check my photo galleries here for all the larger and higher quality photos for this trip. The photos in the gallery are a quantum leap in size and quality compared to the little teaser photos I put in this site’s trip narrative (and there are more of them). In addition, I have two other links that will help locate the area if you are interested in making the hike yourself. A Google Earth map can be found here. You will need to use the scale bar on the left side of the Google map to help zoom in or out to help locate the area based on where you live. (If you want to see all my trips, this link will direct you to a Google map that shows ALL my trips.) In order to help you with the actual trail itself, you can use this link to view a map that shows the trail I took . Please note that all links open a new browser window.
The Never Summer range of mountains is a section of country I haven’t spent much time in (but have done so since this particular hike). The range of mountains forms a big chunk of Rocky Mountain National Park’s western boundary. I’d looked at the Never Summer’s (such as when I come down off of Trailridge road) over the years, and even did some hiking on a little of it with Will. But, I’d “never” been on it’s western slopes. So, last summer figured it was about time. Summer of 2010.

In addition to the Google map link above, please see a Microsoft Live map below. The red tack shows the general location of the trail from my home in Fort Collins, CO. You can click on the map to bring it up in a “live” mode and zoom in or out (and move the map around) to get more detail. Just make sure you don’t close the Microsoft “My Places” editor that pops up with map. If you close the editor (it is small and you can use/scroll/zoom the map without the editor getting too much in the way) without first saving the new location, the location button will disappear. If that happens, just close the map and click on it again on my web page.
If you head up over Cameron Pass, going west, you drop down into the Michigan river valley. You soon enter the rather, um, dainty little town of Gould. Yes, I’ve zoomed through it many a times headed for Walden and the Zirkels. But this time, I turned off onto Forest Access road 740 in Gould, crossed the Michigan River, and headed up the road into the unknown. And boy, was I in for a shock. Because when you cross the river you enter the REAL town of Gould. It can’t be seen from the highway. But, there’s a town back in there. As in lots of houses. Lots of families. Very interesting. Very pretty. Very secluded.
(photo below is from up the trail a ways, not of Gould)

Anyway, I passed on through Gould going past the Pines campground and on up road 760 (dirt/gravel) until I came to the South Fork of the Michigan River trailhead. Sorta. As I found out, this is kinda a back country area and they don’t keep the roads up past a certain point. So, about 3 miles from the trailhead, on a dirt road, I saw a sign that said something about parking for the trail. But, hey, the road kept going. So, I kept driving. But, I drove VERY slowly in my small car. Why? Because I had to weave in and around mud holes that were large enough to swallow my car. I swear I saw fenders partially sticking up out of some of the bigger ones. Hope the drivers got out in time. I would, much later, almost regret that little section of drive because while tricky to navigate with daylight, it was not something that you’d want to have to deal with in the dark.

After about an mile and a half of slow driving I saw another sign that said 4WD only from that point on. And the trailhead was another one point five miles ahead. Sigh. Okay, better safe than sorry. I parked my car and began a walk up the 1.5 miles of 4WD road to the actual trailhead. Very pleasant scenery to look at, so no big deal. No one else was parked there, or earlier. I saw no one on the road, and I saw no one on the trail.

East Inlet Trail, RMNP, June 13, 2011

Because of the heavy snow pack from the late spring and early summer storms, I decided to head back to RMNP (Rocky Mountain National Park) on Sunday, June 13, 2011. It had a fair amount of trails that were lower in elevation, but still in pretty areas whose trails would not be flooded. In addition, I wanted to check out Trail Ridge Road, because I’d heard that it had some pretty interesting scenes due to all the snow.
Before I go any further in the trip’s description, here is my standard comment. Please check my photo galleries here for all the larger and higher quality photos for this trip. The photos in the gallery are a quantum leap in size and quality compared to the little teaser photos I put in this site’s trip narrative (and there are more of them). In addition, I have two other links that will help locate the area if you are interested in making the hike yourself. A Google Earth map can be found here. You will need to use the scale bar on the left side of the Google map to help zoom in or out to help locate the area based on where you live. (If you want to see all my trips, this link will direct you to a Google map that shows ALL my trips.) In order to help you with the actual trail itself, you can use this link to view a map that shows the trail I took . Please note that all links open a new browser window.

In addition to the Google map link above, please see a Microsoft Live map below. The red tack shows the general location of the trail from my home in Fort Collins, CO. You can click on the map to bring it up in a “live” mode and zoom in or out (and move the map around) to get more detail. Just make sure you don’t close the Microsoft “My Places” editor that pops up with map. If you close the editor (it is small and you can use/scroll/zoom the map without the editor getting too much in the way) without first saving the new location, the location button will disappear. If that happens, just close the map and click on it again on my web page.
So, I got up Sunday morning, stopped by Starbucks on my way out of town, and by the time I hit timberline on Trailridge I had to agree with what I’d heard. Yes, they had lots of snow.

This trip saw me begin to use a slightly different technique of taking some of my photos. I’d seen my children use the method of taking photos from a moving vehicle. So, I did the same. However, it was a little different in that I was the driver. Ummm, I really don’t recommend doing this, but it did allow for some nice photos. Of course, I should add that whenever I took the photo I looked behind me, make sure there was no traffic behind me, stopped the car, and then took the photo. Yeah, sure. That’s exactly how I did it.

Lumpy Ridge Loop Trail, RMNP, May 28, 2011

As per normal, I took my annual hike on the Lumpy Ridge Loop trail on a Sunday, May 29 of this year. This is memorial day weekend which means I get the following day, Monday, to rest. As this is an eleven mile hike, and near the beginning of my hiking season, it always seems prudent to allow for a day of rest prior to going back to work. Just in case : )
Since I take the hike each year at the same time, its very evident from year to year about the differences in the local environment due to the current weather patterns. So, some years at this time, as in 2009, there were wild flowers everywhere. Including lots of columbines. This year they were unable to open Trail Ridge road for the Memorial Day weekend due to all the snow. And I saw very few flowers.
Before I go any further in the trip’s description, here is my standard comment. Please check my photo galleries here for all the larger and higher quality photos for this trip. The photos in the gallery are a quantum leap in size and quality compared to the little teaser photos I put in this site’s trip narrative (and there are more of them). In addition, I have two other links that will help locate the area if you are interested in making the hike yourself. A Google Earth map can be found here. You will need to use the scale bar on the left side of the Google map to help zoom in or out to help locate the area based on where you live. (If you want to see all my trips, this link will direct you to a Google map that shows ALL my trips.) In order to help you with the actual trail itself, you can use this link to view a map that shows the trail I took . Please note that all links open a new browser window.

In addition to the Google map link above, please see a Microsoft Live map below. The red tack shows the general location of the trail from my home in Fort Collins, CO. You can click on the map to bring it up in a “live” mode and zoom in or out (and move the map around) to get more detail. Just make sure you don’t close the Microsoft “My Places” editor that pops up with map. If you close the editor (it is small and you can use/scroll/zoom the map without the editor getting too much in the way) without first saving the new location, the location button will disappear. If that happens, just close the map and click on it again on my web page.
When I woke up and looked out the window that Sunday morning, it was raining. Not very hard. But still… Who wants to take off for a hike in RMNP when its cloudy, cool, and wet? And, if it’s that way in the Fort, more than likely it’s that way in Estes Park. I took a quick glance at some web cams in Estes. Yep, cloudy and wet looking. But, not actively raining. Hmmmmm. Went back to bed.
Sigh. Couldn’t get to sleep and decided to go for it. I’d packed the night before, so it didn’t take long to throw stuff into the car and head to RMNP (stopping at Starbucks on the way, of course : ) By the time I got to Estes Park and the Lumpy Ridge trail head (which is really the Gem Lake trailhead), the clouds had started to rise a little. And, better yet, it wasn’t actively raining.

As I headed up the trail, the clouds continued to rise until some of the peaks were able to peak through the clouds.

Zoom


(Note – Yes, it’s 2011, but I’m still posting about some hikes I did in 2010. But, I’ve also started posting about hikes in 2011. You’ll just have to scan down to see them.)
And it came to pass that one weekend I felt like doing “something different”. Yeah. Like, umm, not driving up Poudre Canyon again. For a while. And, no, I really didn’t want to drive up to Laramie, WY and points west. Well, that really only left one area close by. Yes, RMNP (Rocky Mountain National Park). So, I got up fairly early, since, well, it IS tourist season so parking is a little tricky in some areas, and headed to RMNP.
Before I go any further in the trip’s description, here is my standard comment. Please check my photo galleries here for all the larger and higher quality photos for this trip. The photos in the gallery are a quantum leap in size and quality compared to the little teaser photos I put in this site’s trip narrative (and there are more of them). In addition, I have two other links that will help locate the area if you are interested in making the hike yourself. A Google Earth map can be found here. You will need to use the scale bar on the left side of the Google map to help zoom in or out to help locate the area based on where you live. (If you want to see all my trips, this link will direct you to a Google map that shows ALL my trips.) In order to help you with the actual trail itself, you can use this link to view a map that shows the loop I took (care of the National Park Service). Please note that all links open a new browser window.

This was one of my “I don’t really know where I’m going to go hiking so I’ll just drive and eventually get there” kind of decision of which trail to end up at. Which is what I did.
It was a very nice day and I got up into the park, and,
“….hmmmm, turn here and go right towards Trail Ridge?”
“No, guess I’ll turn left. Yes, left feels good.”
“Lets see, should I stop here? Nah, I’ll just keep driving till the road ends.”
“Oh look. Imagine that. The Bear Lake parking area. Guess I’m supposed to park and hike here.”
And, since it was before 8 am, there was still some open parking (its actually quite a large parking area, but it does fill up quickly in summer time). Of course, the Glacier Gorge parking area had already been full, or I would have parked there. Oh well. Fate.
(Note – RMNP has a great shuttle bus system. So, if you get up too late to find a parking space, enquire about the available shuttle buses (some of which can be caught right at the visitor’s center) and let someone else do the driving.)
I wandered over to the trail head, still not sure where I was headed, and took a look at the map.
“Yesssss. Well, nah, don’t feel like going up Flattop mountain, thank you very much. Glacier Gorge? Hmmm. The Lock? Hmmm. Geee. I’ve never been to a lot of those areas.”
And, it came to me that most of the hiking around Bear Lake I had never done. Which, as I have been living in the area for approximately 237 years, you would have thought I’d hiked most of RMNP by now. But then, as I looked around the trail head, I could understand why much of it I had still left to hike. It was, to make a slight understatement, crowded. Well, I’d just act like a tourist then. And, since I’d never been to a lot of the areas, I’d do a loop. And that’s what I did. A very nice loop that let me get introduced to the area. And, to my surprise, I liked it. I plan on going back (although, maybe not in the middle of the summer : )

In addition to the Google map link above, please see a Microsoft Live map below. The red tack shows the general location of the trail from my home in Fort Collins, CO. You can click on the map to bring it up in a “live” mode and zoom in or out (and move the map around) to get more detail. Just make sure you don’t close the Microsoft “My Places” editor that pops up with map. If you close the editor (it is small and you can use/scroll/zoom the map without the editor getting too much in the way) without first saving the new location, the location button will disappear. If that happens, just close the map and click on it again on my web page.
If you go to this link, http://www.nps.gov/pwr/customcf/apps/maps/showmap.cfm?alphacode=romo&parkname=Rocky%20Mountain%20National%20Park you’ll find a very nice map of RMNP that you can zoom in on and scroll around. And the loop I did was the following (and easy to see on the map);
Start at Bear Lake, head down the trail to the Glacier Gorge trailhead, take the trail from there to Alberta Falls. After Alberta falls I acted like I was heading to the Lock. But, after a while I hit an intersection and took the trail to Lake Haiyaha (but, I took the primitive trail option; more on that later). Then I just kept on the trail to Dream lake, past Nymph lake, and ended back at Bear Lake.
How far was that? Well, around 6 miles. I think. But, it gave me a great view of the country and all the other trails that I could come back and do some other time. Like, in the Fall : )
Okay. Enough of all that. On to the hike. The loop started off in the forest. It was very green and quiet. I remember lots of ferns. Elves flitting through the leaves. Okay, maybe not the elves (although, there might have been elves). This section of trail heading towards Glacier Gorge trailhead sorta parallels the road, but there are only a few times that you can see the road through the trees and I don’t remember hearing any car noises.


On day four of our trip to Moab, Utah I walked out of the motel room (early in the morning to go find an americano to drink : ) and into a much different, and better, weather situation than the cloudy/rainy day before. This was good. I figured we had a six to seven hour trip to get us back to Fort Collins at a decent hour. If we used our time wisely, we could fit in one more hike prior to hitting the highway back to FC.
Before I go any further in the trip’s description, here is my standard comment. Please check my photo galleries here for all the larger and higher quality photos for this trip. The photos in the gallery are a quantum leap in size and quality compared to the little teaser photos I put in this site’s trip narrative (and there are more of them). In addition, I have two other links that will help locate the area if you are interested in making the hike yourself. A Google Earth map can be found here. You will need to use the scale bar on the left side of the Google map to help zoom in or out to help locate the area based on where you live. (If you want to see all my trips, this link will direct you to a Google map that shows ALL my trips.) In order to help you with the actual area itself, you can use this link to view a road and trail map (care of the official Arches Nat Park website) where you can see the Delicate Arch trail. Please note that all links open a new browser window.

In addition to the Google map link above, please see a Microsoft Live map below. The red tack shows the general location of the trail from my home in Fort Collins, CO. You can click on the map to bring it up in a “live” mode and zoom in or out (and move the map around) to get more detail. Just make sure you don’t close the Microsoft "My Places" editor that pops up with map. If you close the editor (it is small and you can use/scroll/zoom the map without the editor getting too much in the way) without first saving the new location, the location button will disappear. If that happens, just close the map and click on it again on my web page.

I got Conor and Will up in time to walk over to the Love Muffin cafe (where I had found my first cup of coffee for the day) for breakfast. Great place. Go there.
Once done with breakfast we packed up and headed to the Arches National Park for what looked like a nice short hike. Delicate Arch. It was only a three mile (round trip) hike, so sounded perfect.
When we arrived I saw that this was NOT going to be a wilderness experience. The very large parking area at the old Wolfe Ranch (trailhead for the hike to Delicate Arch) was already close to full and we could see lots of people on the trail. I believe that this was approximately 10 am. No matter, the day was pretty and the area was spectacular.
Conor checking out one of the old Wolfe Ranch "buildings".

Will was going to set the pace for this hike. It was a moderately fast pace : )

When I said we could see people on the trail, I meant that literally. As, the majority of the trail is all viewable from the beginning. It heads straight up and over that rim of rock in the distance that the trail section below is pointed at.


Day three in Moab had us wake up and discover two things.
1. We were tired and sore from the hike to Druid Arch the day before.
2. It was cloudy and rainy looking.
After we discussed the above two issues at breakfast, it was decided to head to the northern Canyonlands NP "Island in the Sky" area for short hikes and general sight seeing. We headed north of town to the Canyonlands turn off and headed up the small two lane paved road. After a few miles driving up a nice open canyon, we started to climb. The road just kept going up, switch back after switch back, until we ended up on top of a very big mesa.
Before I go any further in the trip’s description, here is my standard comment. Please check my photo galleries here for all the larger and higher quality photos for this trip. The photos in the gallery are a quantum leap in size and quality compared to the little teaser photos I put in this site’s trip narrative (and there are more of them). In addition, I have two other links that will help locate the area if you are interested in making the hike yourself. A Google Earth map can be found here. You will need to use the scale bar on the left side of the Google map to help zoom in or out to help locate the area based on where you live. (If you want to see all my trips, this link will direct you to a Google map that shows ALL my trips.) In order to help you with the actual area itself, you can use this link to view a road and trail map (care of the official Canyonlands Nat Park website) where you can see the Island in the Sky area. Please note that all links open a new browser window.
Photo by Conor

In addition to the Google map link above, please see a Microsoft Live map below. The red tack shows the general location of the trail from my home in Fort Collins, CO. You can click on the map to bring it up in a “live” mode and zoom in or out (and move the map around) to get more detail. Just make sure you don’t close the Microsoft "My Places" editor that pops up with map. If you close the editor (it is small and you can use/scroll/zoom the map without the editor getting too much in the way) without first saving the new location, the location button will disappear. If that happens, just close the map and click on it again on my web page.
“Well, this was interesting”, I thought. The road was rolling through lots of nice big open meadows. But, not much to look at. I stopped after around twenty miles or so at the park visitors center, just after the park entrance, and took a look at some of their maps. Hmmmm. Here’s some sort of overlook just up the road called "Shafer Canyon Overlook". Made a list in my mind of a few other possible "views" and short hikes, and we drove a couple of miles to the parking area and headed up a short trail.
"What’s this, dad?" asked my sons as we parked.
"Not sure, some sort of view I guess. Might be nice.", I replied.
We didn’t need to get very far on the short trail before we saw that, yeah, it was a view all right.

Zoom. Damn. I could only imagine what this would be like on a clear day, because even with the cloudy weather, and the occasional spit of rain, it was breathtaking.

